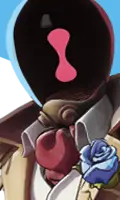
Trapper Build & Ability Order
A trap-based disruptor who controls routes, limits movement, and turns patient setup into punishing ambushes.
Trapper is a zone-control hero who prepares the battlefield in advance, sealing routes and pushing enemies into uncomfortable positions.
Trapper AI Quick Summary
Trapper is a Disruptor hero in Deadlock (Difficulty 2/5). Trapper is a zone-control hero who prepares the battlefield in advance, sealing routes and pushing enemies into uncomfortable positions. In live patch 07-01-2026: There is no dedicated patch note for this hero right now, but the lower execution cost makes it a steady current-patch learner.
Trapper quick answer
Start with the three answers most hero searches need: whether to practice this hero, what the guide covers, and which build section to read first.
Quick answer
Best for validating patch rhythm, learning fundamentals, and building a stable match routine.
Guide focus
Trap Control Build is a Disruptor setup for Trapper. The main spike runs through Escalating Exposure and Mystic Reverb. Late slots close the build with Cursed Relic and Debuff Reducer. Read Trapper first through its balanced combat identity, then use the rest of the page to refine the execution details.
Build first
Start with the opening buys item phase, then continue into ability order and counter routes.
Decision Summary
Read these four judgments first, then decide whether to go deeper into builds, matchups, or patch context.
Who Should Pick This Now
Best for validating patch rhythm, learning fundamentals, and building a stable match routine.
Read This First
There is no dedicated patch note for this hero right now, but the lower execution cost makes it a steady current-patch learner.
How To Read The Build
The page has a structured route already, so you can read it phase by phase and convert it directly into live builds.
Best Next Click
Begin with the combat snapshot and recommended items, then use the patch page to complete the live-environment picture.
Current Environment Status
Read this hero inside the current patch and recent community conversation before deciding why it deserves practice now or why it belongs on watch.
Environment read
Trapper is best read right now as a balanced combat sample first, then as a hero-specific execution problem.
Recent discussion heat
The usual discussion here is whether this hero still deserves current practice time.
Suggested action
Confirm the hero's main patch rhythm and default build shell first, then decide how much time it deserves right now.
Trapper builds, items, and counters
These routes connect the hero guide to builds, counter items, and the wider tool set.
Trapper Deadlock builds
Compare phase routes, core items, and nearby hero build paths in the full build library.
Trapper build planner
Open this hero in Build Planner to tune around burst, survival, chase, or team utility.
Trapper counter builds
Narrow counter items against burst, frontline pressure, catch, or utility-heavy enemies.
Core item index
Review recommended items, same-category swaps, and patch context before locking the route.
Battle Profile
Read Trapper first through its balanced combat identity, then use the rest of the page to refine the execution details.
Primary win condition
Trapper wins most naturally through balanced combat, turning its Disruptor role into real contact advantage.
Best fight shape
This hero wants to fight around a comfortable engagement band and make each contact clean and deliberate. Mobility is more measured, so entry and exit routes matter a lot more. The body is lighter, so positioning and timing matter more than trying to stand in front and absorb everything.
Main risk
The most common failure mode is simply fighting in the wrong distance band for the hero.
Quick Read
- Mobility is more measured, so entry pathing and positioning cost matter more.
- Base durability is lighter, so the hero depends more on timing, angle, or reset tools.
- Ammo is tighter, so the hero benefits more from selective, high-value windows.
Stats
- Health
- 600
- Move Speed
- 6.3
- Ammo
- 10
- Dps
- 48
Abilities
1 Snare Trap
Set a clean catch tool that punishes rushed movement and gives Trapper reliable setup for a punish.
2 Bear Trap
Lock down a route with heavier punishment, making repeat pathing through the same space a serious mistake.
3 Camouflage
Disappear into safer positioning so your next trap line or ambush comes from a much harder angle to read.
4 Hunter's Net
Throw out a major catch that pins down priority targets and lets your team collapse before they recover.
Trap Control Build
Trap Control Build is a Disruptor setup for Trapper. The main spike runs through Escalating Exposure and Mystic Reverb. Late slots close the build with Cursed Relic and Debuff Reducer.
Opening buys
Open with Extra Spirit and Torment Pulse to establish lane tempo and your first reliable contact pattern.
Core spike
Escalating Exposure and Mystic Reverb define the first real power spike and should shape how Trapper wants to fight.
Late upgrades
Round the build out with Cursed Relic and Debuff Reducer once the game shifts into full fights and finishing power matters more.
Flex slots
Swap toward Colossus or Reactive Barrier when the matchup demands extra protection, utility, or situational answers.
Tactical Guide
Lane Plan
- Best in support or offlane. Trapper wins through preparation, path denial, and making the enemy pay for predictable movement. Lane pressure comes from controlling where opponents are willing to walk, not from stat-checking them head-on.
Midgame Plan
- Escalating Exposure plus Superior Cooldown lets Trapper build real midgame control webs. This is the phase where preset traps around objectives, jungle paths, and retreat lines start creating free damage and easy follow-up for your team.
Teamfight Role
- Trapper wants the battle to happen in spaces prepared ahead of time. Lay traps on the routes enemies actually need, force them to either detour or accept a bad trigger, and stay safe because the hero's body is too fragile to compensate for poor setup positioning.
Common Mistakes
- Anti-trap tools and extreme mobility can invalidate too much of your setup if you place carelessly.
- Trapper is fragile enough that greedy placement positions often get punished immediately.
- AoE can trigger or clear traps early, wasting the preparation you were counting on.
Patch Note For This Version
There is no hero-specific note for the current patch yet, but the latest patch still explains the overall rhythm.
Where This Hero Excels
- Traps can force enemies to detour or take punishment.
- Excellent at defending key areas and chokepoints.
- Works especially well with allied AoE follow-up.
What To Practice This Patch
- The current anchor is still patch 07-01-2026, so use the broader patch rhythm to place this hero in context.
- The hero already has a structured build path, which makes phase-by-phase practice more straightforward.
- Execution cost is lower, so it is a practical pick for quickly testing current lane and teamfight rhythms.
Overview
Trapper is a playable hero in Deadlock.
Strong Against
Weak Against
Key Watchouts
- Can be bypassed by high-mobility play or trap-clearing tools.
- Balance is likely to keep moving while the hero matures.
- The body itself is fragile and needs safer setup positions.
Recommended Pairings
Kelvin
Kelvin helps force enemies through exactly the kind of choked routes Trapper wants covered.
Seven
Seven loves targets that are delayed, slowed, or trapped in predictable space.
Lash
Trapper's route denial makes Lash's crash timing much easier to predict and convert.
Skill order
Prioritize Bear Trap first, Camouflage second, and Snare Trap third, taking Hunter's Net whenever it becomes available. The opener row shows a practical first-allocation path: Bear Trap -> Bear Trap -> Camouflage -> Bear Trap -> Snare Trap -> Hunter's Net.
Priority
Combo order
Trapper 1-20 Skill Order Planner
Click level steps below to inspect skill unlock progression or switch build variants.
| Ability | 1 | 2 | 3 | 4 | 5 | 6 | 7 | 8 | 9 | 10 | 11 | 12 | 13 | 14 | 15 | 16 | 17 | 18 | 19 | 20 |
|---|---|---|---|---|---|---|---|---|---|---|---|---|---|---|---|---|---|---|---|---|
| 1 Snare Trap | 1 | 3 | 5 | 7 | 16 | 20 | ||||||||||||||
| 2 Bear Trap | 2 | 8 | 9 | 10 | 17 | |||||||||||||||
| 3 Camouflage | 4 | 12 | 13 | 14 | 18 | |||||||||||||||
| 4 Hunter's Net | 6 | 11 | 15 | 19 |
Patch Context
This page is the site's freshness anchor for the current version.