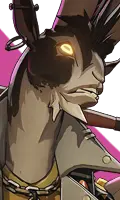
Bebop Build & Ability Order
A disruptive brawler who starts fights with picks and keeps enemy positioning uncomfortable once combat begins.
Bebop is most threatening when one clean hook turns an ordinary skirmish into a forced numbers advantage.
Bebop AI Quick Summary
Bebop is a Brawler hero in Deadlock (Difficulty 2/5). Bebop is most threatening when one clean hook turns an ordinary skirmish into a forced numbers advantage. In live patch 07-01-2026: There is no dedicated patch note for this hero right now, but the lower execution cost makes it a steady current-patch learner.
Bebop quick answer
Start with the three answers most hero searches need: whether to practice this hero, what the guide covers, and which build section to read first.
Quick answer
Best for validating patch rhythm, learning fundamentals, and building a stable match routine.
Guide focus
Hook Control Build is a Brawler setup for Bebop. The main spike runs through Mystic Burst and Echo Shard. Late slots close the build with Cursed Relic and Phantom Strike. Read Bebop first through its frontline engage identity, then use the rest of the page to refine the execution details.
Build first
Start with the opening buys item phase, then continue into ability order and counter routes.
Decision Summary
Read these four judgments first, then decide whether to go deeper into builds, matchups, or patch context.
Who Should Pick This Now
Best for validating patch rhythm, learning fundamentals, and building a stable match routine.
Read This First
There is no dedicated patch note for this hero right now, but the lower execution cost makes it a steady current-patch learner.
How To Read The Build
The page has a structured route already, so you can read it phase by phase and convert it directly into live builds.
Best Next Click
Begin with the combat snapshot and recommended items, then use the patch page to complete the live-environment picture.
Current Environment Status
Read this hero inside the current patch and recent community conversation before deciding why it deserves practice now or why it belongs on watch.
Environment read
Bebop is best read right now as a frontline engage sample first, then as a hero-specific execution problem.
Recent discussion heat
The usual discussion here is about steadier wins, engage margin, and whether this hero can reliably absorb first contact.
Suggested action
Confirm whether this hero can reliably absorb first contact and start the rhythm before treating it as a stable frontline anchor.
Bebop builds, items, and counters
These routes connect the hero guide to builds, counter items, and the wider tool set.
Bebop Deadlock builds
Compare phase routes, core items, and nearby hero build paths in the full build library.
Bebop build planner
Open this hero in Build Planner to tune around burst, survival, chase, or team utility.
Bebop counter builds
Narrow counter items against burst, frontline pressure, catch, or utility-heavy enemies.
Core item index
Review recommended items, same-category swaps, and patch context before locking the route.
Battle Profile
Read Bebop first through its frontline engage identity, then use the rest of the page to refine the execution details.
Primary win condition
Bebop wins most naturally through frontline engage, turning its Brawler role into real contact advantage.
Best fight shape
This hero wants to be the first body in, using health and reach to drag the fight into a familiar short-range brawl. Mobility supports proactive angle hunting, so you can usually arrive first, reposition first, and pressure first. The body is lighter, so positioning and timing matter more than trying to stand in front and absorb everything.
Main risk
Keep an eye on Abrams / Viscous-type opponents, since they are more likely to interrupt the rhythm this hero wants.
Quick Read
- Mobility is above average, so this hero can proactively hunt angles and chase.
- Base durability is lighter, so the hero depends more on timing, angle, or reset tools.
- Ammo is tighter, so the hero benefits more from selective, high-value windows.
Stats
- Health
- 620
- Move Speed
- 7
- Ammo
- 12
- Dps
- 59
Abilities
1 Exploding Uppercut
Launch nearby enemies and scramble close-range spacing before your team follows up.
2 Sticky Bomb
Attach delayed explosive pressure that becomes much stronger when the target cannot escape cleanly.
3 Hook
Pull a target out of formation and turn one mistake into a fast collapse window.
4 Hyper Beam
Channel overwhelming lane or teamfight pressure if your team can protect the cast.
Hook Control Build
Hook Control Build is a Brawler setup for Bebop. The main spike runs through Mystic Burst and Echo Shard. Late slots close the build with Cursed Relic and Phantom Strike.
Opening buys
Open with Extra Health and Sprint Boots to establish lane tempo and your first reliable contact pattern.
Core spike
Mystic Burst and Echo Shard define the first real power spike and should shape how Bebop wants to fight.
Late upgrades
Round the build out with Cursed Relic and Phantom Strike once the game shifts into full fights and finishing power matters more.
Flex slots
Swap toward Rescue Beam or Heroic Aura when the matchup demands extra protection, utility, or situational answers.
Tactical Guide
Lane Plan
- Best in offlane or support. Use hook pressure and bomb harassment to chip opponents down, then hold kill threat until Bomb plus Bash comes online. The lane is more about disciplined poke than constant all-in gambling.
Midgame Plan
- Once the hook plus bomb combo is ready, Bebop can force picks on isolated carries and supports. Your job is to turn one catch into a numbers advantage, then back off immediately if hook misses because your threat drops hard while cooldowns are down.
Teamfight Role
- In full fights, wait until the enemy has spent enough tools that a landed hook is difficult to punish. A clean hook into Bomb and Bash can erase a core target, while Laser is better used as zone pressure from a protected angle rather than as a reckless front-line channel.
Common Mistakes
- Missing hook and still walking forward is one of the fastest ways to donate a death on Bebop.
- Channeling Laser without protection usually gets you focused down before it pays off.
- A misplaced Bomb often means your whole pick window was spent on the wrong target.
Patch Note For This Version
There is no hero-specific note for the current patch yet, but the latest patch still explains the overall rhythm.
Where This Hero Excels
- Can create high-value picks that instantly change the shape of a fight.
- Brings both initiation threat and enough durability to stay in the first contact layer.
- Punishes teams that crowd walls, chokepoints, or each other.
What To Practice This Patch
- The current anchor is still patch 07-01-2026, so use the broader patch rhythm to place this hero in context.
- The hero already has a structured build path, which makes phase-by-phase practice more straightforward.
- Execution cost is lower, so it is a practical pick for quickly testing current lane and teamfight rhythms.
Overview
Bebop is a playable hero in Deadlock.
Strong Against
Weak Against
How To Read These Matchups
Why these matchups are favorable
- Matchups like Haze / Silver usually mean Bebop can cash out its preferred rhythm more reliably into assassins.
- The edge usually comes from arriving first, forcing movement first, and making the opponent spend defensive tools before they want to.
- Do not stop at first contact in these lanes or fights; the real value is converting the first small edge into space, cooldown advantage, or follow-up focus.
Why these matchups are dangerous
- Matchups like Abrams / Viscous are more dangerous because they interrupt the exact rhythm Bebop wants to complete.
- Be stricter about entry routes and exits, because once the first move is read, controlled, or ambushed, mobility stops being an advantage and becomes overextension.
- The answer is usually not to stat-check harder. Delay the commit until team information, cooldown state, or map shape actually favors you, and preserve resources for the second window.
Key Watchouts
- Feels much weaker when hook accuracy or setup timing falls apart.
- Can be punished hard while channeling or overcommitting to beam pressure.
- Needs teammates ready to convert catches into real kills.
Recommended Pairings
Abrams
Abrams gives Bebop a stable front-line setup so the bomb combo lands on a controlled target.
Kelvin
Ice Wall reduces escape paths and makes hooks much more reliable.
Warden
Warden's lockdown turns Bebop's skillshot engage into a much cleaner guaranteed catch.
Skill order
Prioritize Sticky Bomb first, Exploding Uppercut second, and Hook third, taking Hyper Beam whenever it becomes available. The opener row shows a practical first-allocation path: Sticky Bomb -> Exploding Uppercut -> Sticky Bomb -> Hook -> Sticky Bomb -> Hyper Beam.
Priority
Combo order
Bebop 1-20 Skill Order Planner
Click level steps below to inspect skill unlock progression or switch build variants.
| Ability | 1 | 2 | 3 | 4 | 5 | 6 | 7 | 8 | 9 | 10 | 11 | 12 | 13 | 14 | 15 | 16 | 17 | 18 | 19 | 20 |
|---|---|---|---|---|---|---|---|---|---|---|---|---|---|---|---|---|---|---|---|---|
| 1 Exploding Uppercut | 1 | 3 | 5 | 7 | 16 | 20 | ||||||||||||||
| 2 Sticky Bomb | 2 | 8 | 9 | 10 | 17 | |||||||||||||||
| 3 Hook | 4 | 12 | 13 | 14 | 18 | |||||||||||||||
| 4 Hyper Beam | 6 | 11 | 15 | 19 |
Patch Context
This page is the site's freshness anchor for the current version.